News


Soakaway Pits: Sizing, Depth and Installation Basics
16 Nov 2026Soakaway Pits: Sizing, Depth and Installation Basics
Every soakaway starts life as a hole in the ground, and that hole is the soakaway pit. The pit is the excavation that receives roof and surface runoff and hands it to the soil. What goes inside the pit decides everything else — loose rubble in an old garden, or a rated crate array in a modern build. This page covers how pits are sized, how deep the crates go, and the installation basics that keep the pit working. It stays at the pit scale; the store inside it has guides of its own.
Soakaway Pit vs Soakaway Crate System
The two terms describe different layers of the same job. The pit is the hole; the crate system is what fills it. An old-fashioned pit is backfilled with gravel or rubble and relies on the gaps between stones to hold water. A crate system drops interlocking plastic modules into the pit so the modules, not the stones, hold the void.
| Rubble-filled pit | Pit with crate array | |
|---|---|---|
| Void per m³ of hole | Roughly 30% | ≈95% (920 L/m³ net) |
| Load on the surface | None by design | Verified >45–>85 T/m² vertical |
| Silt resistance | Voids clog silently | Silt trap upstream keeps fines out |
| Dig volume for same storage | Much larger | Smaller and shallower |
The practical consequence shows up under load. A rubble pit under a lawn can settle and lose capacity quietly. A crate array keeps its geometry because the lattice carries the earth and any traffic above it. That is why driveway-rated pits are always crate-lined. A rated model carries verified loads above 45 T/m², and heavy-duty plates go far higher.
Ownership tells the same story over the years. A rubble pit gives no warning as it silts; the first sign is a puddle that outstays the rain. A crate-lined pit puts the failure where you can reach it — a silt trap to empty and a chamber to lift. The dig happens once either way; only one of the two options keeps its capacity while you own it.
The crate family has its own pillar page at soakaway crates. The load-bearing module behind both names is detailed on the geocellular crates page.
What Goes Into the Pit
Whatever fills it, a pit needs the same three fittings around the store. A base that sits level, so water spreads across the whole void instead of pooling at one corner. A geotextile jacket, so the surrounding soil stays out of the void while the water passes through. And a silt trap on the inlet, so the fines that every roof sheds settle where they can be emptied. Skip the trap and the pit becomes the trap — just one that costs a re-dig to clean.
How Deep Should a Soakaway Pit Be?
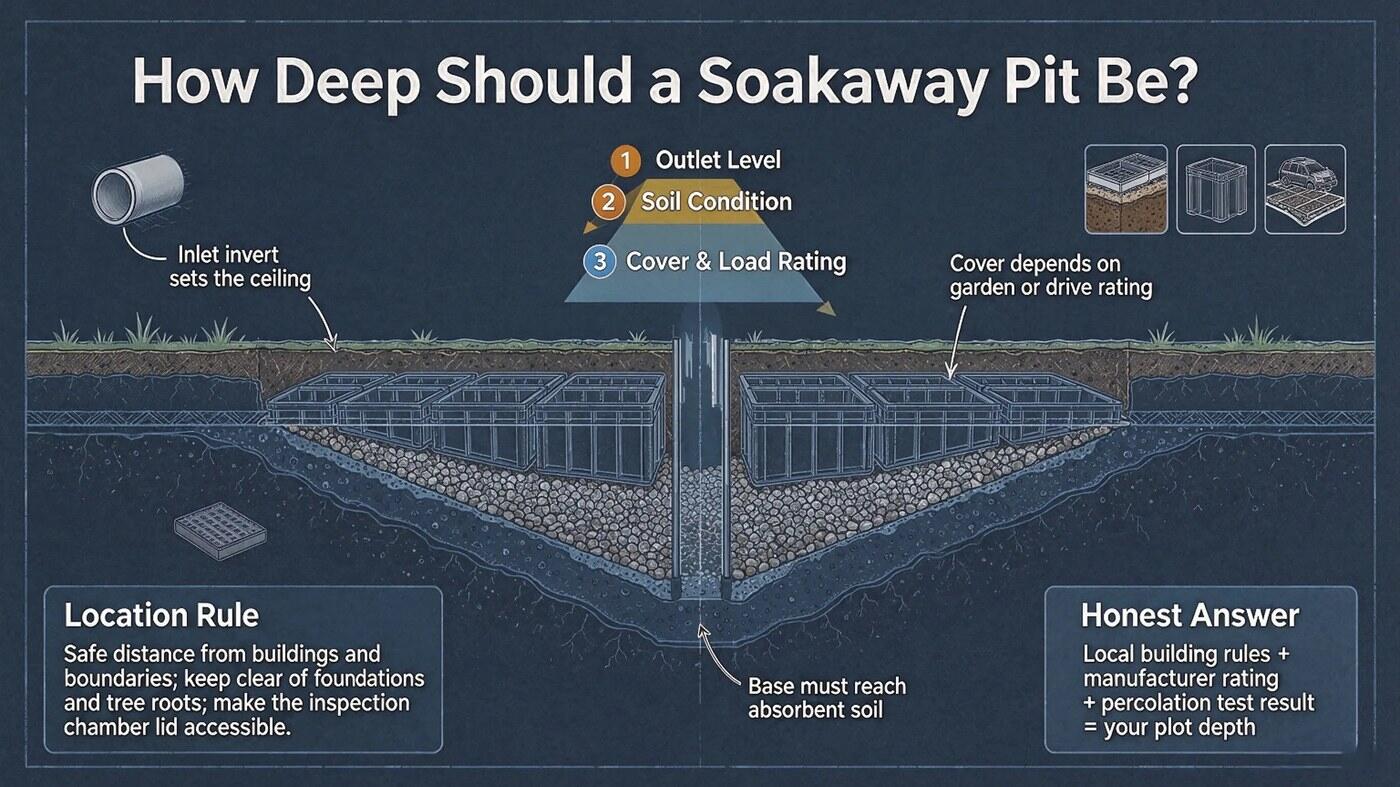
Depth follows three constraints, in this order.
The outlet level comes first. The pit must sit below the pipes that feed it, so the inlet invert sets the ceiling of the design. Dig the pit too high and water cannot reach it; dig it too low and the feeder runs uphill.
The soil comes second. The base of the pit must reach soil that actually drinks. Topsoil and made ground often drain poorly, so the dig continues until the soak test confirms a layer that absorbs. Where clay starts a spade's depth down, a deeper pit will not fix it — that plot needs a different drainage strategy.
The cover over the crates comes third. A garden array typically carries a modest layer of soil and turf. A drive-rated array needs the cover depth its load rating assumes. Deep-burial variants exist for heavier cover, rated to 8 m in engineered designs.
So how deep should soakaway crates be buried? The honest answer is that local building rules and the manufacturer's rating decide it, not a rule of thumb. The percolation test result, the inlet level, and the surface load fix the depth for your plot. Manufacturer drawings state the minimum and maximum cover for each rated model; treat those figures as the working envelope.
One location rule sits alongside depth: the pit needs a safe distance from buildings and boundaries, which local guidance sets. Keep the footprint clear of foundations and tree roots, and keep the inspection chamber somewhere a lid can actually be lifted.
Installing a Soakaway Pit: The Sequence at a Glance
The full build has its own guide on soakaway installation. The sequence, in brief:
1. Dig and set the level. Excavate to the sized footprint, with the base level and the invert below the inlet.
2. Lay the geotextile. Line the pit with fabric, leaving enough to fold over the top.
3. Assemble the crates. Click the plates together inside the pit and fit the inlet chamber.
4. Wrap and backfill. Fold the fabric closed, then backfill in layers and reinstate the surface.
Each step has inspection points that building control may ask about, which is why the detailed guide exists. For a garden downspout soakaway on free-draining soil, a competent DIYer can manage the small version. Anything under a drive, or anything sized by calculation rather than habit, belongs to a professional install.
Two digging pitfalls account for most failed pits. The first is a base left uneven, so the void fills from one corner and the far side never works. The second is a pit dug into made ground — old builder's spoil drains unpredictably, and the percolation result measured there will not repeat. Both are found at the dig, while they are still free to fix.
Where the Pit Fits the Wider System
A pit is the end of a line, not the whole line. Upstream sit the gutters, gullies, and channel drains — the parts covered in the stormwater drainage systems guide — and a silt trap right before the pit. Downstream, if the soil fails the soak test, the same excavation logic pivots to a lined storage-and-release design. The concept behind the whole family, and what the word means on drawings, is unpacked in what a soakaway is.
Frequently Asked Questions
How to fix a blocked soakaway?
Work upstream to downstream. Lift and empty the silt trap first — in most blocked cases that is the whole fix. Next, jet or rod the inlet pipe between the trap and the pit. If water still stands over the pit after a few dry days, the void itself has silted. The honest fix is excavation and rebuild with a crate array and a proper trap. Repeated blockages are a design problem, not a maintenance one.
How much does an attenuation tank cost?
Attenuation tanks are quoted per project, because three inputs drive the price: storage volume, loading class, and ground conditions. The same crate hardware serves the attenuation duty when it is wrapped in an impermeable geomembrane and fitted with a flow-control outlet. For context on how the two duties differ, see the soakaway vs attenuation comparison. Send the three inputs to the manufacturer for a project quotation rather than a catalogue price.
How deep should soakaway crates be buried?
The cover over a crate array follows its load rating and the local rules. A garden array takes a shallow cover of soil and turf. A driveway-rated array needs the cover depth its rating assumes, and heavy-duty plates accept far more. The percolation result, the inlet invert, and the surface load fix the depth together. Confirm the figure against the manufacturer's drawing before you dig.
What can I use instead of soakaway crates?
The traditional alternative is a rubble- or gravel-filled pit, and it still works for small downspout soakaways on sandy ground. It stores far less per cubic meter, carries no load rating, and silts up without warning. Where the ground cannot soak water at all, the answer is not a different fill. It is a lined storage system that releases water slowly instead. The right substitute depends on the soil, not on the catalogue.
For a sized pit and crate layout, send inflow area, soil type, and surface load to YY Tank.